
We all take inspiration for our web design from other sites. A good webmaster is always on the lookout for interesting designs and functionality on all the webpages they visit. How often have you stumbled across an article or a blog where you’ve said to yourself “I want that on my site!” One of the most important changes you can make to your site design is tweaking the font. You’ll be amazed at how much it impacts the readability of an article. Coupled with the font size, the line height, and the color, you can transform the perusal of your site from a chore to a pleasure.
In my opinion, one of the most interesting fonts available to webmasters today is called “Roboto”. Initially developed by Google for use with the Android operating system, it’s now available freely for anyone to use. In this article, I’ll show you how to implement the Roboto font on your website, and in the process also teach you the general process for incorporating any font. The process is made particularly easy for us due to Google’s webpage which automatically generates the required code.
Finding the Roboto Font Online
To start off, visit the Google fonts URL on any web browser. This is a centralized database of open source fonts maintained by Google for anyone to use. You can see in the screenshot below that the left-hand side provides a number of parameters by which you can drill down to the specific font you want.
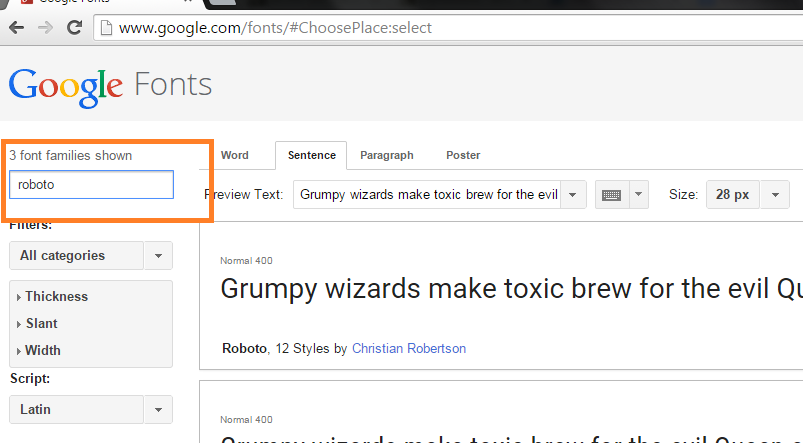
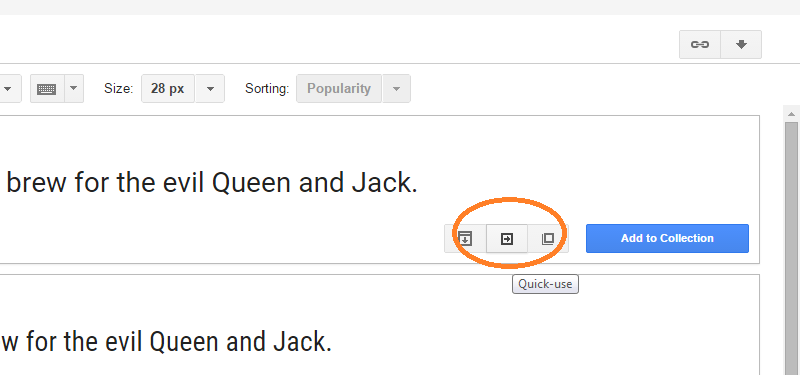
You can narrow it down by the font family, the appearance, as well as the script. Or you can just specify the exact font you’re looking for by typing in the name of the font in the search box at the top left-hand corner. In this example, I’ve typed in “roboto” and its returned three results. These are displayed in the right-hand pane so you can immediately recognize the appearance. In our case, I’m looking at the very first result. Since we’re only interested in getting the code and nothing else, hop over to the right-hand side of the screen where you will see a “Quick-use” button sandwiched between two others.
Clicking this takes you to the font selection and code generation screen. Each font has a number of sizes and formatting. You can choose any one or all of them, but there is a caveat. The more number of options you select, the more time it will take for the fonts to load on your website. To help you with this, there is a “Page Load Meter” on the right-hand side of the screen.

As you select more and more font options, the needle will show you the impact on the webpage speed. Try and keep it within the green section as far as possible – a pretty looking site is great, but the value of a fast loading site can’t be overestimated!
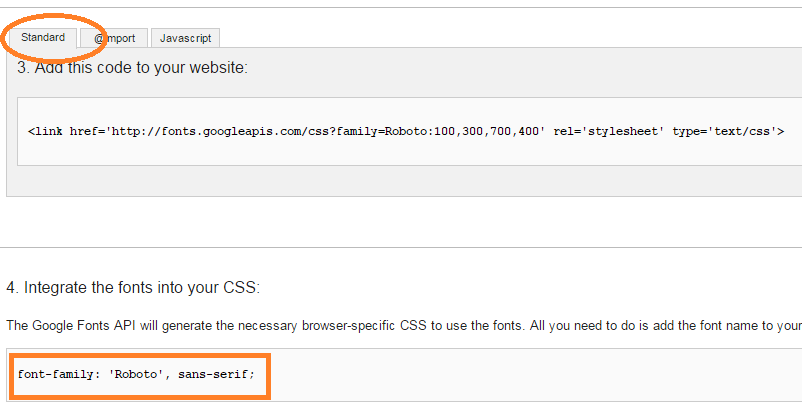
Once you have your fonts selected, scroll down to get the code. There are two separate sections for this. The first consists of a resource that needs to be placed in the header of your WordPress blog, where is the second gives you the CSS style for inclusion.
Let’s see how to incorporate both of these.
Incorporating the Fonts
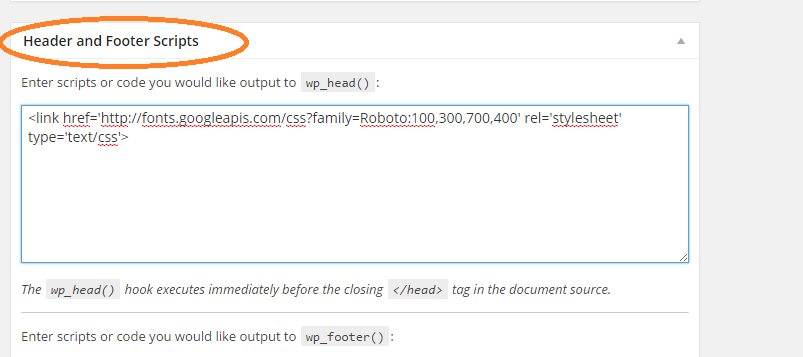
To start off, you need a way to include header code into your blog. There are several ways to do this. You can modify your WordPress theme file directly, but this has a terrible disadvantage. Every time your theme updates, your custom code will be wiped out. Other options include developing a child theme, but it’s beyond the scope of this article. If you just want a simple and scalable solution, install a plug-in such as “Insert Headers and Footers”. It allows you to place arbitrary code into your WordPress blog without the danger of your changes getting wiped out by a subsequent update. Whatever method you choose, copy and paste the code from the Google font website as shown below:
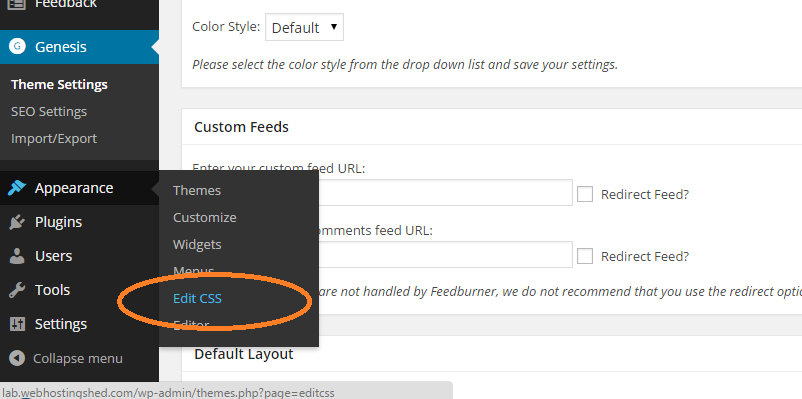
This takes care of the first piece of code pointing to the source of the Roboto font file. Now we need to include the CSS. Once again, we face the same problem. You can always modify your style.css file directly, but these changes will get wiped out on an update. The best solution I’ve found is to install the WordPress Jetpack plug-in. Chances are you already have it on your site since it has a huge number of features, and it incorporates the functionality of several plug-ins into one. Once you have it installed in your site, go to “Edit CSS” under the “Appearance” menu on the left-hand side of WordPress.
In the resulting screen, copy and paste the following code which borrows from the second code box of the Google fonts screen:
p {
font-family: ‘Roboto’, sans-serif;
}
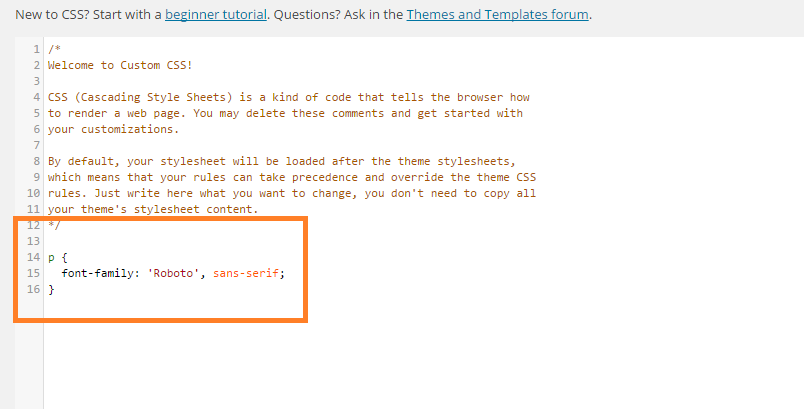
This little snippet specifies that all “paragraphs” must follow the Roboto style when available. Save the CSS page. It’s now time to see whether our changes have had any effect.
Here is a sample page of my site before the installation of Roboto:

And here’s what it looks like after:
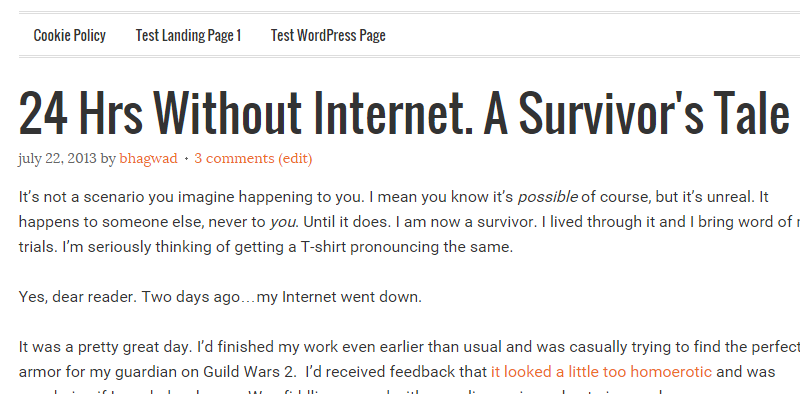
You can easily make out that the font style has changed. You can use this method to replace your existing font with any of the 667 available fonts on the Google website. Even if you don’t find the one you’re looking for, you have a broad idea of what you need to do to incorporate your own custom fonts into WordPress. Happy designing!
Nick Anderson Operates Dailyhosting.net , Which provides WordPress Web Hosting products.