
Adding a Menu
- Click Appearance -> Menu in the Admin Panel
- Click Create a New Menu
- Enter menu name and click Create Menu
- Check Primary Menu and press Save Menu (only if Primary Menu)
- Select menu pages and click Add to Menu
- Click Save Menu
Menus in Customizer
- Click Appearance -> Customize in the Admin Panel
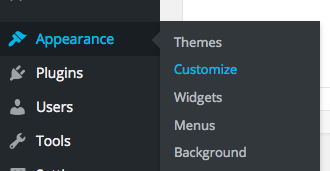
- Select the Menus panel (near the bottom of the options)

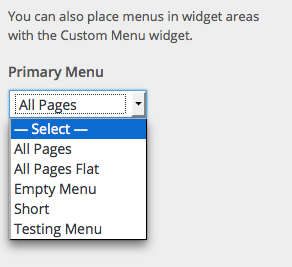
- Go to Menu Locations

- Set your Primary Menu
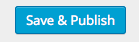
- Press Save & Publish
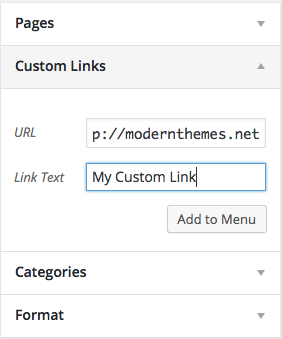
Creating Custom Link
- Click Appearance -> Menu in the Admin Panel
- Select the menu you would like to add custom link to
- Click on Custom Links
- Add URL and Link Text
- Click Add to Menu
- Arrange link where you would like it to be in menu order
- Click Save Menu
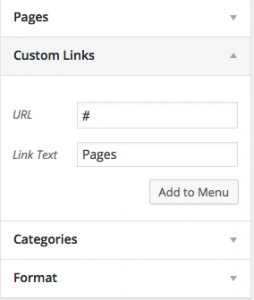
Creating Unclickable Custom Link
- Click Appearance -> Menu in the Admin Panel
- Select the menu you would like to add custom link to
- Click on Custom Links
- Add a # to the URL field and Link Text (see example below for unclickable link)
- Click Add to Menu
- Arrange link where you would like it to be in menu order
- Click Save Menu
Editing a Menu
- Click on the down arrow next to the page name
- Edit page detail
- Click Save Menu
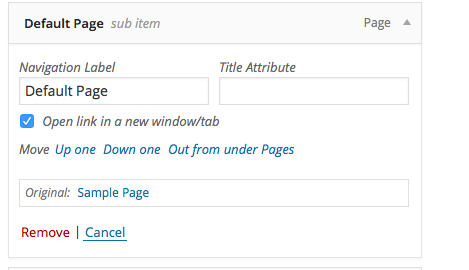
Opening Link in New Window
- Click Screen Options at the top of the page
- Check Link Target
- Click on the down arrow next to the page name to open page details
- Check Open link in a new window/tab (see below)
- Click Save Menu
Creating Multiple Menus
- Click Create a New Menu
- Enter new menu name
- Select menu to edit from down arrow
- Set menu location
- Click Save Changes
Delete a Menu
- Select menu
- Click Delete Menu
- Press OK